Using the Simulator
Opening the Arena
Before you can start using the simulator, you need to have followed the steps in the Setting up the Simulator section.
To open the arena, you need to start in the folder you extracted the simulator during setup and run the run_simulator.py script.
This will open Webots with the arena loaded and ready to run your code.
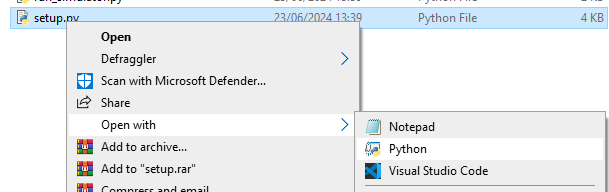
In order to run the Python script, instead of opening the file you may need to right-click and select Open with → Python.
The Webots Interface
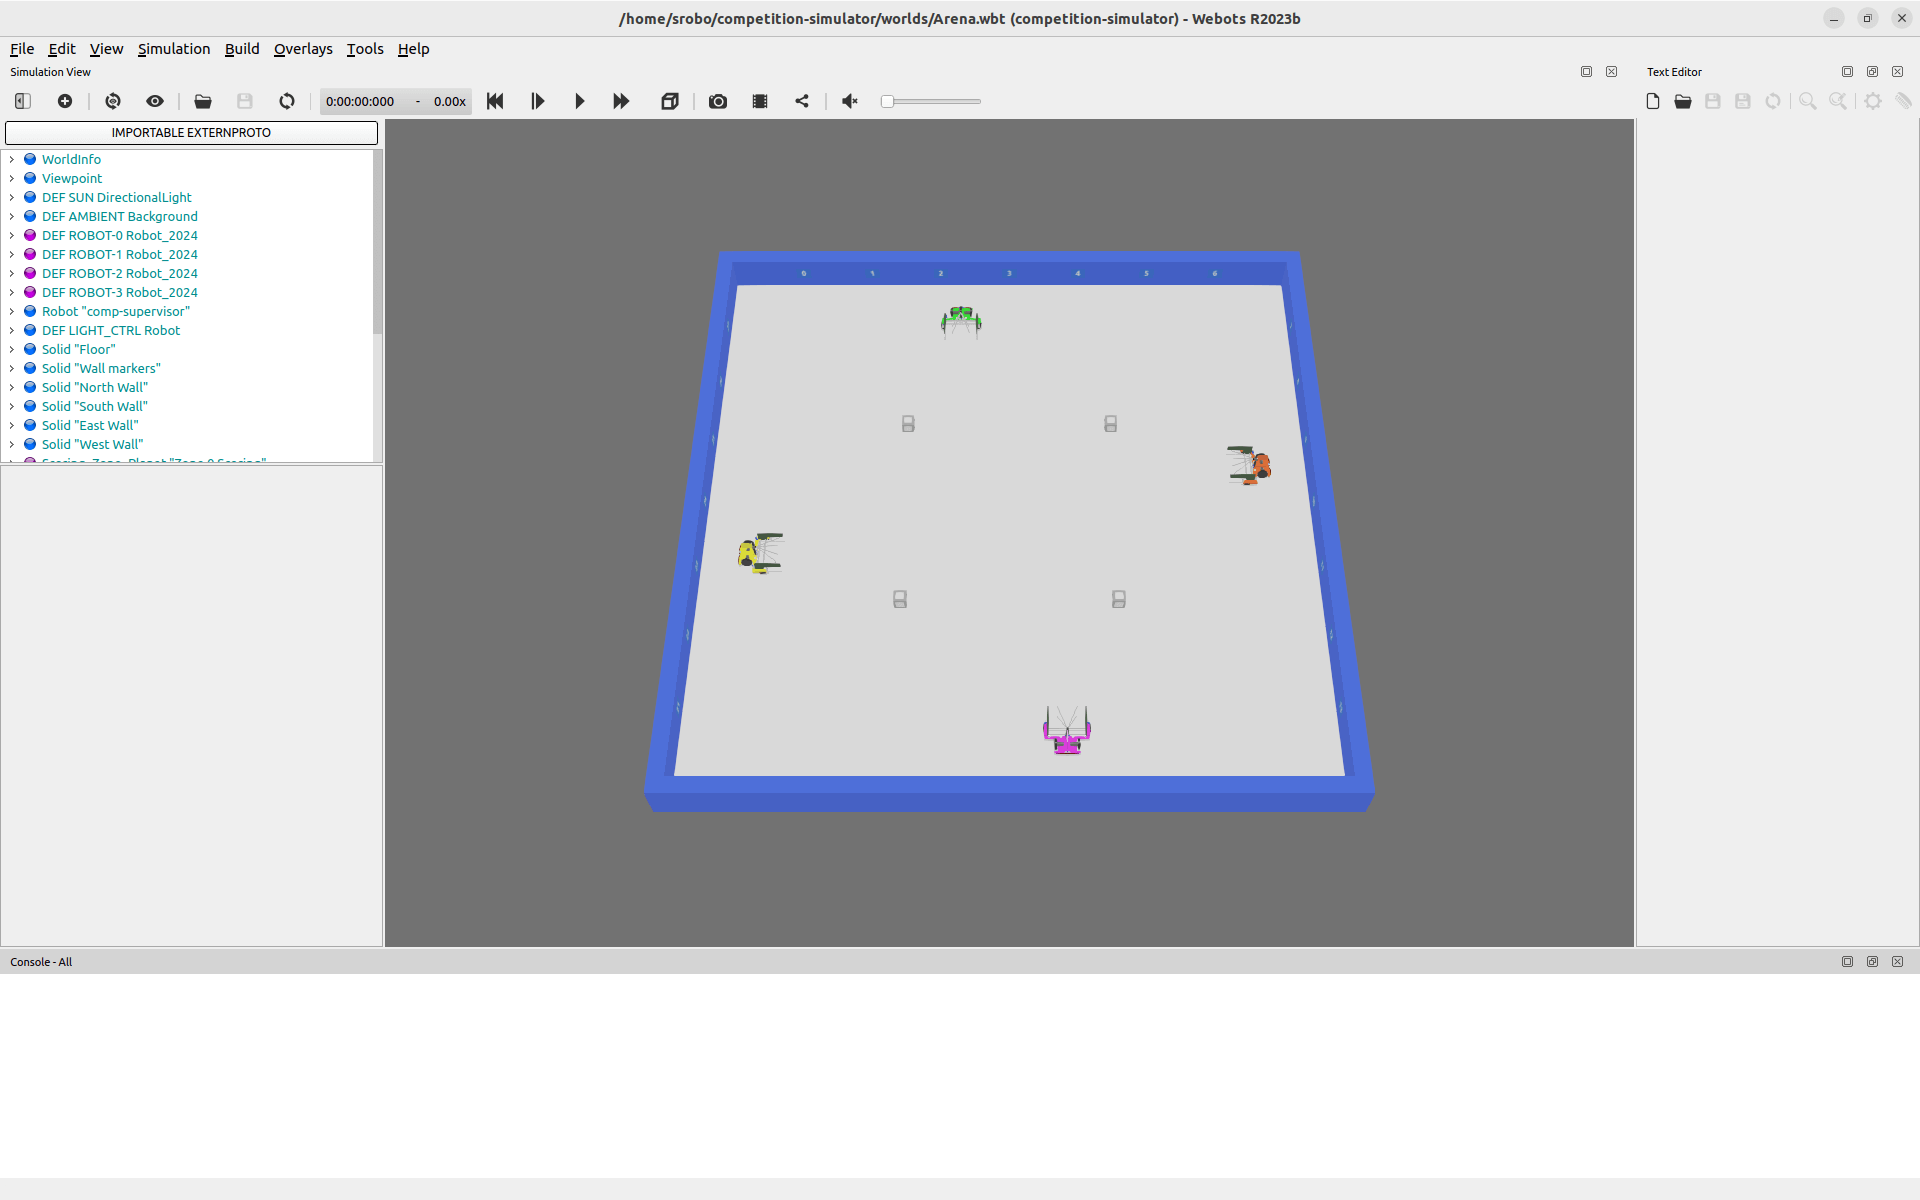
After opening the arena, you should see a window similar to the one below. This is the Webots interface, which has 5 key areas:
- The 3D world where the simulation takes place.
- The camera overlay, which shows the images from the robot’s camera.
- The time controls, which allow you to control the speed of the simulation.
- The console, which shows logs from your code and Webots itself.
- The “Scene Tree” which shows the objects in the simulation.
- The built-in text editor, which allows you to edit your code. We recommend using an external editor instead to make use of features like syntax highlighting and code completion.
It can be useful to change your view into the world using the camera controls.
The Camera Overlay
The camera overlay shows the images from the robot’s camera.
This only updates when robot.camera.see() is called in your code.
This image is the raw image that the robot sees, and is not processed in any way. To see the processed image, look at saving images in the camera interface to see how to save annotated images.
If the camera overlay is closed and you want to get it back, you can use the Reopening the Camera Overlay instructions.
Time Controls
In the simulator, time advances only at the pace that the simulator is run. The relation between this time and the real passage of time depends on a couple of factors: the speed the simulation is configured to run at and the ability of the computer running the simulation to process it fast enough.
You can configure and observe the speed the simulator is running at from the toolbar in webots:

From left to right, this has the following controls:
- Reload the world, which will reset the simulation to the start and reload your code.
- The current time in the simulation. The forth segment is the milliseconds.
- The speed multiplier, which shows how fast the simulation is running.
- Reset the simulation to the start. This resets the time to 0 but does not fully reload the world.
- Single step the simulation. This advances the simulation by one step which is 8 milliseconds.
- Play the simulation at normal speed. This icon is a play button when the simulation is paused.
- Run the simulation at maximum speed. The speed is limited by the computer’s ability to process the simulation.
The Console
The console at the bottom of the screen shows all the logs produced by Webots which includes logs from your code.
Where your code logs are are printed they are prefixed with the zone number and simulation time. Lines are displayed in red if they were printed to standard error instead of standard output.
There are also some Webots error messages that you may see, such as:
- WARNING: The current physics step could not be computed correctly.
- This is because the simulator is having to slightly move objects to avoid them intersecting with each other. Generally this can be safely ignored.
- Forced termination (because process didn’t terminate itself after 1 second).
- This is because the runner for your code didn’t exit by itself when the simulation ended. Generally this can be safely ignored.
Developing your code
Now that you have the simulator set up, you can start developing your code.
In the folder where you extracted the simulator, you should have a folder called zone_0.
In this folder, you should have a file called robot.py.
This is the code that will be run in the simulator.
The API for the simulator is the same as the API for the physical robot, so you can use largely the same code in both environments. Check out the simulated robot page for information on where the sensors and motors are located on the robot.
When you make changes to your code, you need to save the file and then reload the world in Webots to see the changes. See the Time Controls section for how to reload the world.
As well as the logs being displayed in the console, they are also saved to a file.
This file is saved in the zone_0 folder and has a name in the format log-zone-<zone>-<date>.log.
The date is when that simulation was run.
Points of Interest
As well as the guidance above, there are a few other points to note when using the simulator. These can help you to understand what is happening and how to get the most out of the simulator.
Simulation of Time
As time in the simulator is part of the simulation itself, your code must regularly sleep to allow time to progress.
To allow the simulation to be run at various speeds, time.sleep must not be used.
Instead, robot.sleep should be used.
This allows the simulator to simulate the time your robot would be sleeping for.
For similar reasons, to obtain the current time, robot.time must be used over time.time.
While the simulator does simulate the time taken for each call to our API, it does not simulate the time taken for general computation.
This means that if you have a loop that does not contain a robot.sleep, the simulator will freeze as it waits for the loop to complete.
If you find the timer is not advancing, or is very slow, you likely have a loop without a sleep.
Generally, it is best practice to have a robot.sleep in every loop, even if it is a very short time.
Reopening the Camera Overlay
To reopen the camera overlay if it has been closed, you can follow these steps:
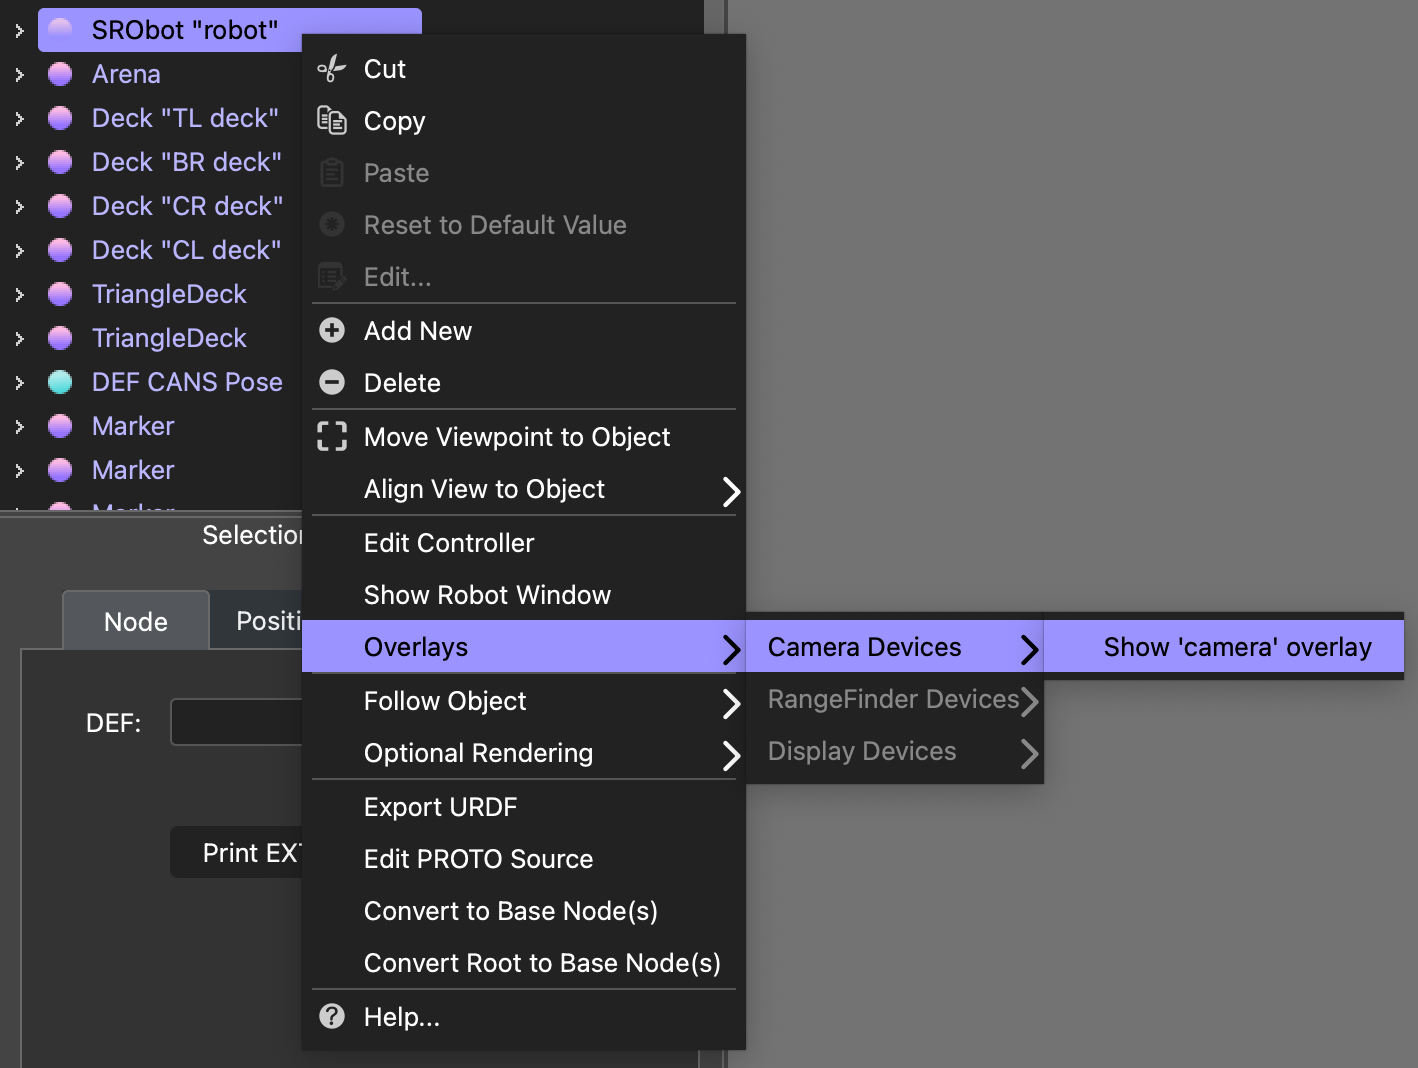
- Select the robot. This can either be done by clicking on the robot in the 3D world, or by selecting SRObot in the Scene Tree to the left.
- Right-click on the robot.
- Go to Overlays → Camera Devices → Show ‘camera’ overlay.
This menu can be seen in the image below.
Once visible, the camera overlay can be resized by dragging the bottom right corner of the overlay. The overlay can also be moved around the screen by clicking and dragging on the window.
Viewing Sensor Paths
In addition to the camera overlay, Webots also supports displaying some of the geometric information that is used to simulate the robot’s sensors. This can be useful for debugging and understanding how the robot is interacting with the world.
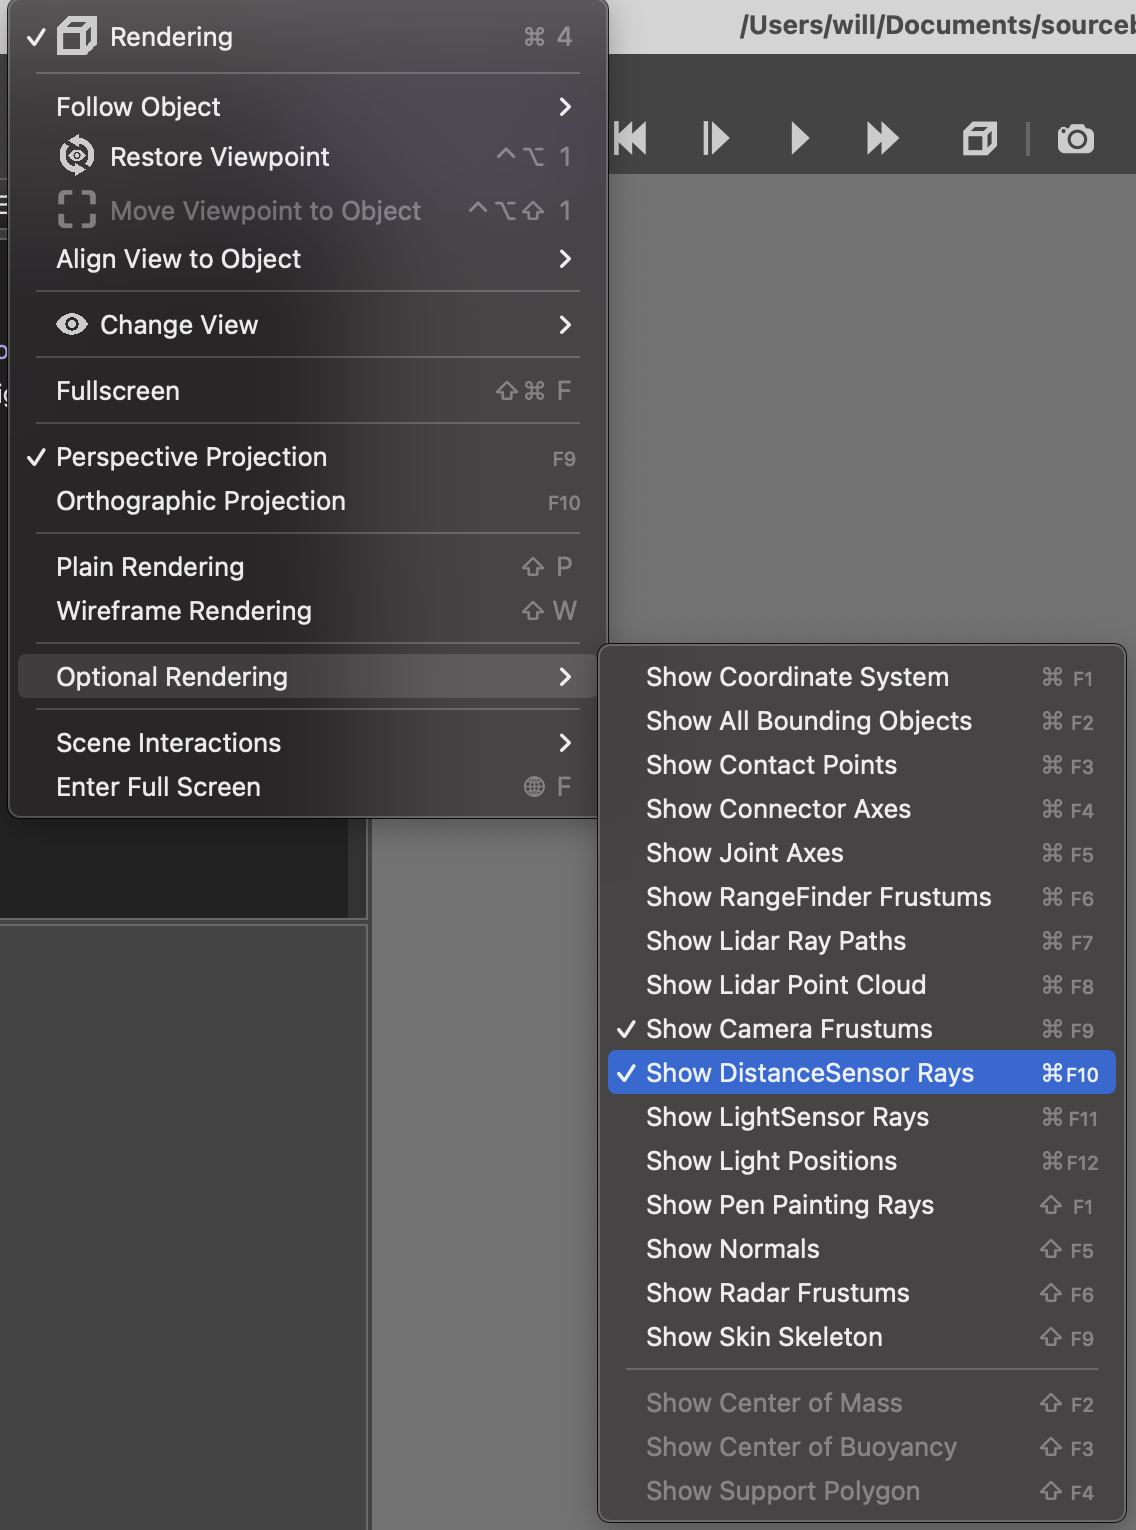
To view the field of view of the camera, you can enable the option by going to View → Optional Rendering → Show Camera Frustums. This will show the area that the camera can see in the 3D world.
To view the paths of the ultrasound sensors, you can enable the option by going to View → Optional Rendering → Show DistanceSensor Rays.
This menu can be seen in the image below.
Select the option again to disable the display of the sensor paths.
Using Other Zones
If the arena has multiple starting zones, you can run multiple robots in the simulator. To test how your robot behaves in each starting zone of the arena, you can copy your robot’s code to run in each corner.
In the folder where you extracted the simulator, alongside the zone_0 folder, you may have other zone_<number> folders.
Such as zone_1, zone_2, etc.
Each of these folders can contain a robot.py file that will be run in the corresponding starting zone of the arena.