Markers
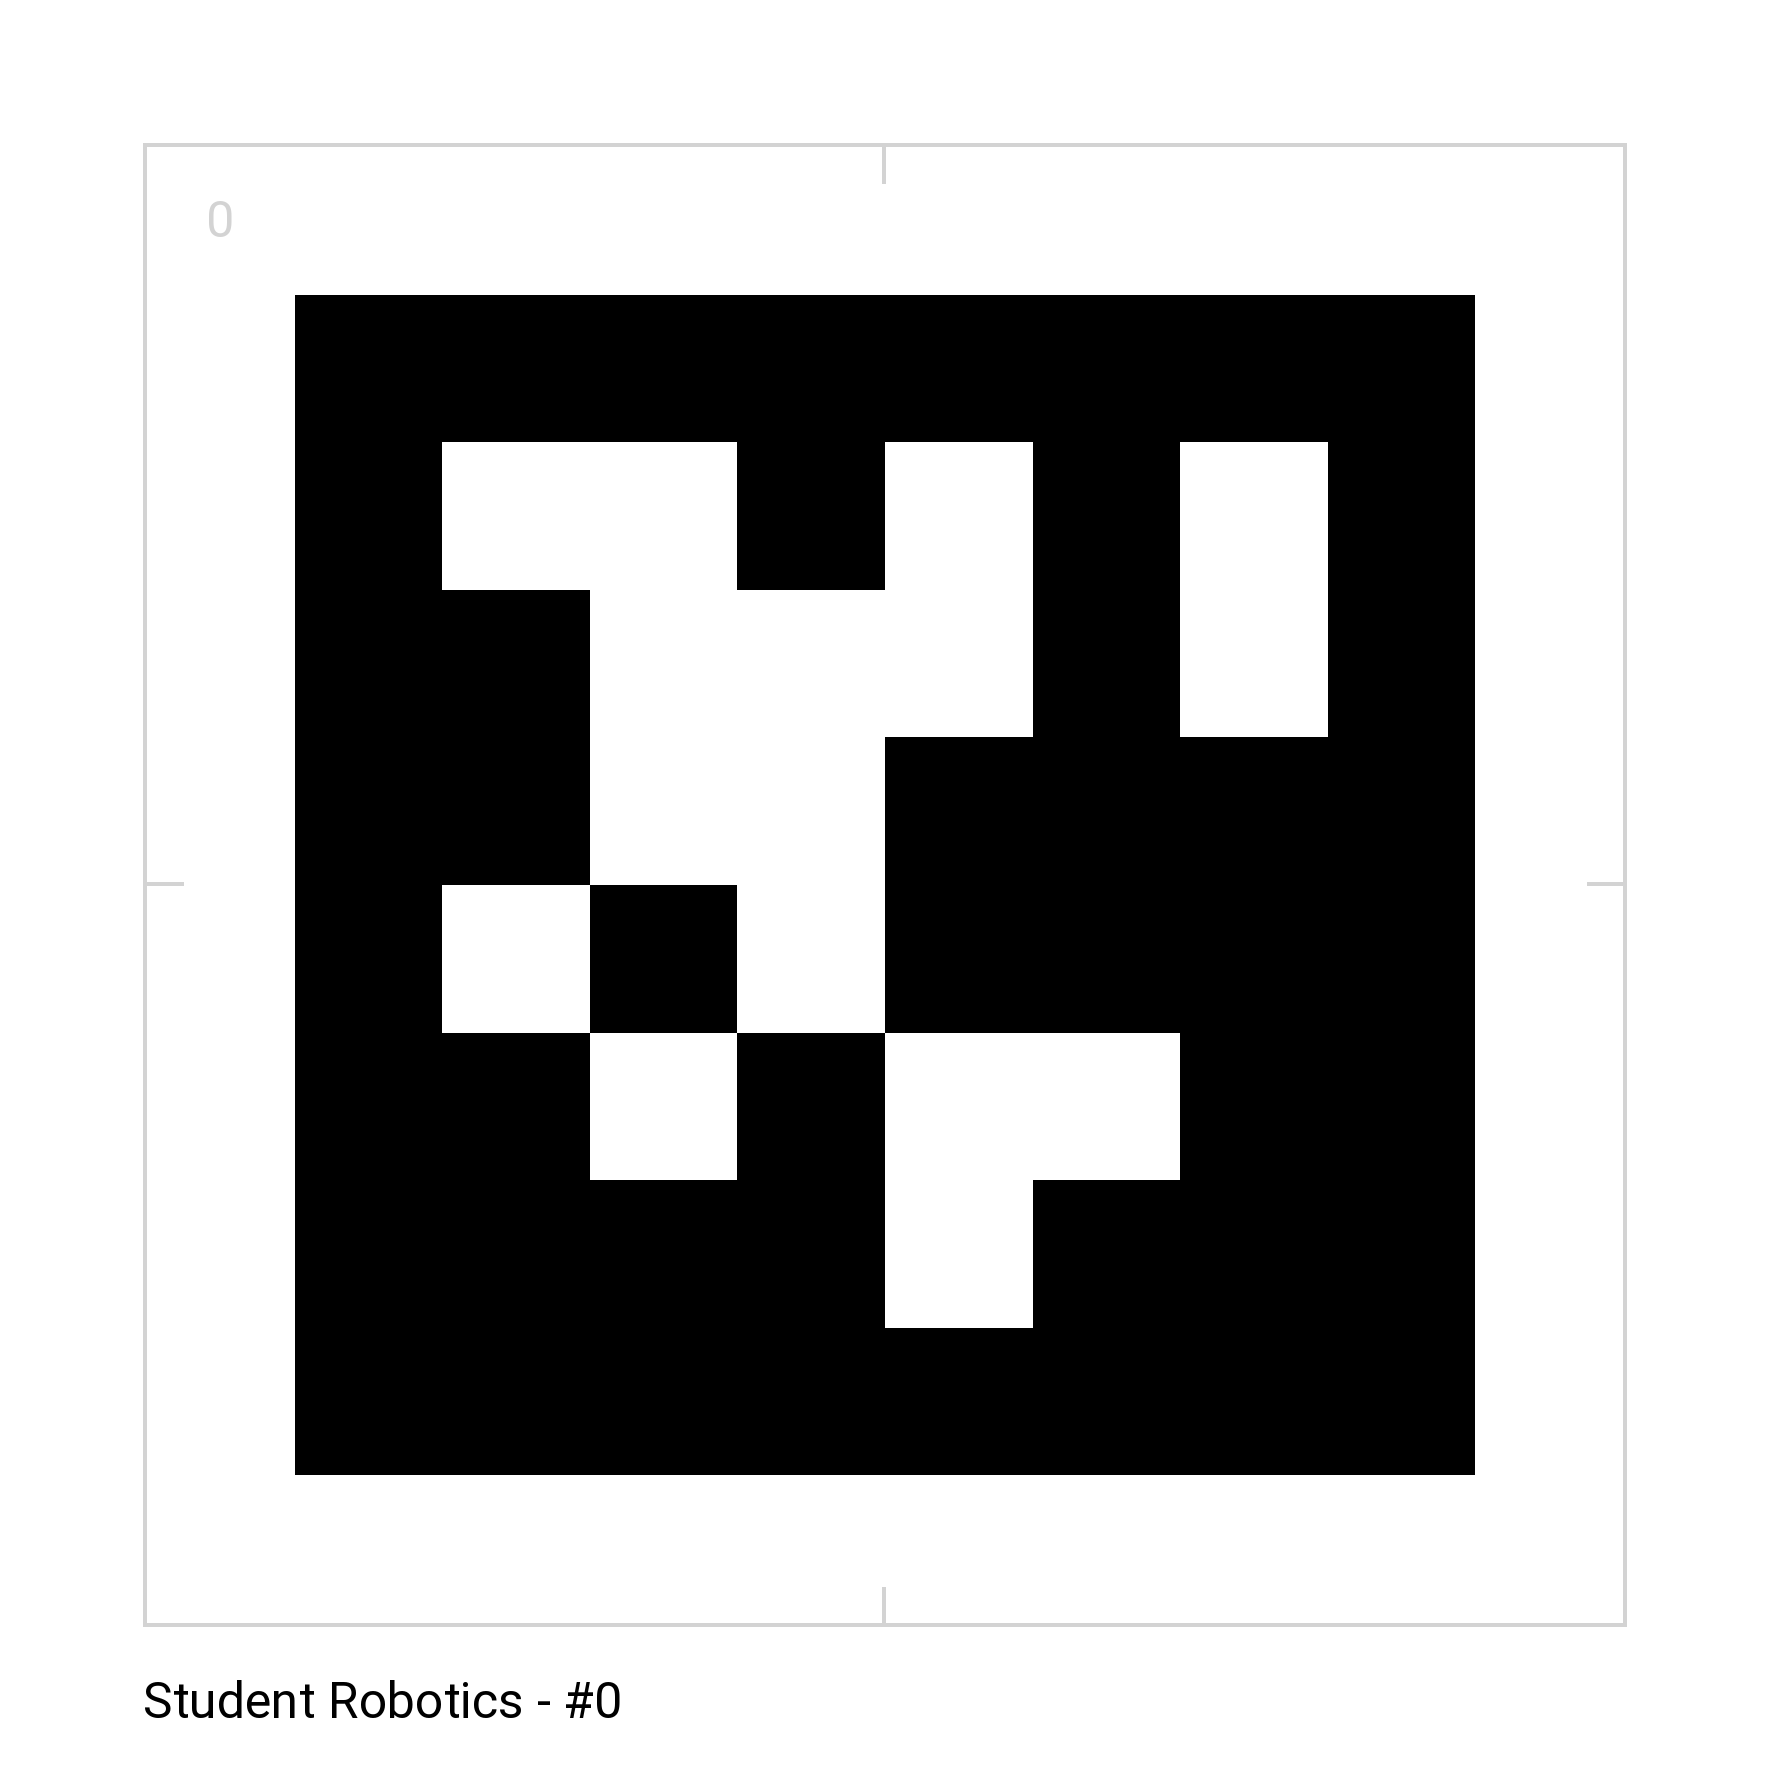
An example marker is given to the right; this one is ID number 0.
The marker is the correct way up, as shown by the text in the bottom left corner.
There is also some text in the bottom-left corner of the marker, in its padding: Student Robotics - #0.
Student Roboticsmeans that it is one of our markers#0means that it is marker number 0
Details of the types and size of markers used in the game can be found in the rules.
You can download all the markers for this years game from the resources page.
Printing markers
The size of the printed markers is very important. The vision system relies on the size of the marker to estimate its position. If the marker is the wrong size the information returned by the API will be incorrect.
When printing the markers you must ensure that your PDF viewer is not resizing the document. This can be checked by measuring the black of the marker and comparing this to the size defined in the rules.
Once printed the marker should be mounted on a rigid backing material to keep the marker flat. Any distortion in the marker will cause inaccuracies in the numbers reported by the API.
If the markers become damaged (scuffs, tears, etc…) they will not function as well, if this happens, it is best to just print another one.
Marker detection
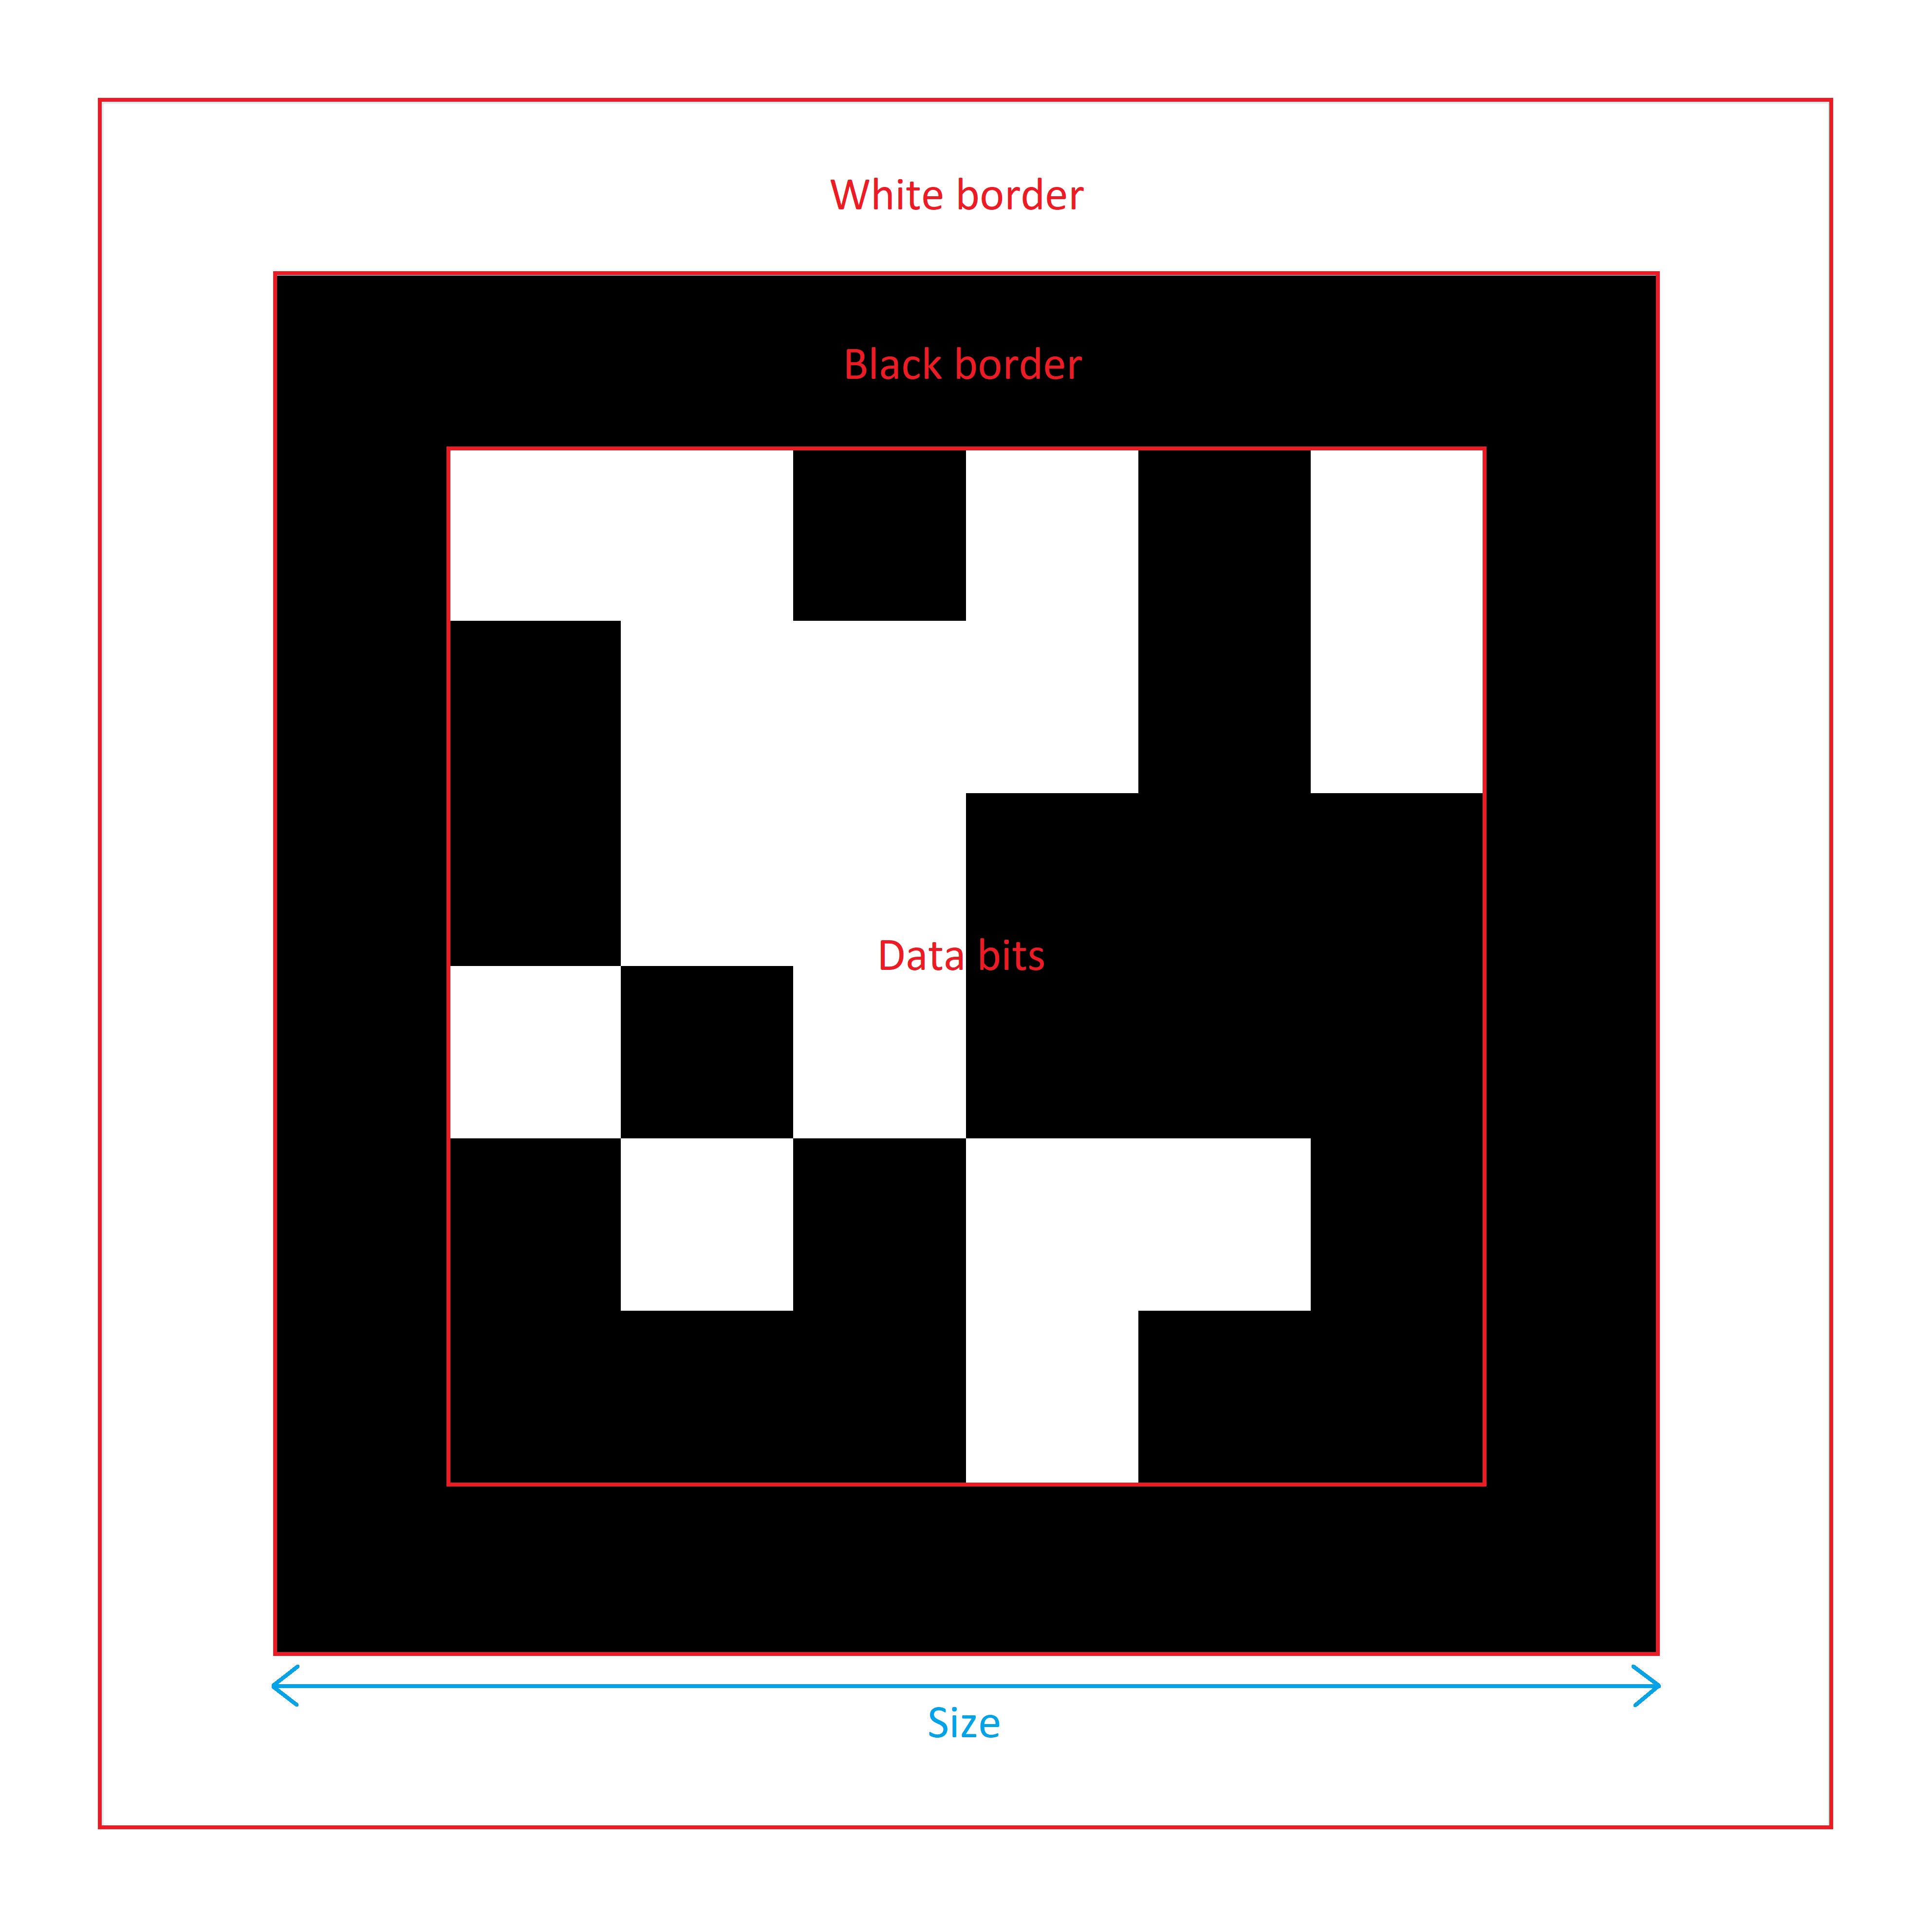
All of the content within the grey line is important:
- The white border is used to create contrast between the black of the marker and the background.
- The black border is used for Pose Estimation where the position of the four corners and the knowledge of the size of the marker is used to approximate its location in 3D space.
- The data bits in the centre are used to identify the ID of the marker and have enough polygons to not be confused with a real world object.
The marker can be cut out up to the grey line.